World War II Photography made easy!
My daughter went to a World War II DDay reenactment in Ohio a couple weeks ago. A friend she traveled with took this great shot of a mutual friend who was in one of the groups stationed there. She thought it would look impressive if it was "old fashioned" like photos from the war. Well we can't go back and do it so we use Photoshop! With that said, Photoshop is a powerful tool and there are many ways to "age" an image, this is one way.
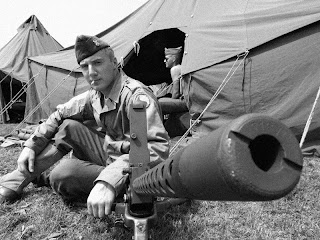
The original photo was taken with a Canon Power Shot SX30 IS at 4320 X 3240 pixels. It took some other wonderful shots that day!
 First thing we did was change the image to grayscale, adjusted the levels to get more contrast and added texture by using the noise filter. Using Gaussian distribution and checking Monochromatic worked the best.
We created a new layer and selected a nice brown for our sepia tone. Then used "select all" and filled the layer with the sepia color we chose. we changed the layer attribute from normal to "Color" and adjusted the opacity to 82 percent.
Next I found some historical information about England and airfields near South Hampton dock where a lad his age might have been stationed a couple days before DDay. I hand wrote the text on paper and scanned it in. Once added into our image on its own layer I changed the layer attribute from normal to "Darken". This effectively removed the background.
First thing we did was change the image to grayscale, adjusted the levels to get more contrast and added texture by using the noise filter. Using Gaussian distribution and checking Monochromatic worked the best.
We created a new layer and selected a nice brown for our sepia tone. Then used "select all" and filled the layer with the sepia color we chose. we changed the layer attribute from normal to "Color" and adjusted the opacity to 82 percent.
Next I found some historical information about England and airfields near South Hampton dock where a lad his age might have been stationed a couple days before DDay. I hand wrote the text on paper and scanned it in. Once added into our image on its own layer I changed the layer attribute from normal to "Darken". This effectively removed the background.
Images from that time weren't typically borderless so I set guidelines approximately a quarter inch from the edges and used the rectangular select tool to draw a box. I then inverted the selection to get the outer edges selected. I filled the layer with white and had my border. This layer was currently above the sepia layer.
This is the fun step. Here you see the scratches layer I used. It needs to obviously fill the entire area so scale it if you need to. Set the layer attribute from normal to "Hard Light" and adjust the opacity to your liking. We set our opacity to 70 percent
This gave us the final look! we moved the frame layer behind the sepia and scratches layer so it had the same faded and yellowed feel as the rest of the image.
As I mentioned, this is one of the many ways to achieve the desired effect. There are many others and I encourage you to experiment and find what you like!
Enjoy!

 First thing we did was change the image to grayscale, adjusted the levels to get more contrast and added texture by using the noise filter. Using Gaussian distribution and checking Monochromatic worked the best.


No comments:
Post a Comment