Still playing catch up. Did this one back on May and just getting it up now.
As you can see the deck had multiple layers and was peeling a good bit.
The railings were already removed and we got right to sanding off the old layers with an industrial strength drum sander.
The wood under all the old paint and stain was solid so no repairs were needed and the new stain went on smoothly.
Once all was removed a nice coat of Benjamin Moore Arborcoat Solid Stain was applied.
Porch and posts all painted....
And here we have the new railings in place and everything ready for a relaxing summer.
Let us know if we can help you relax this summer!
Enjoy
Tuesday, July 22, 2014
Saturday, July 19, 2014
Landscaping and Porch Painting Again!
Here's a few before and after shots of a nice little place over in Bethel Park that needed a bit of help from Hendersonworks.
Shrubs were removed and mulched then the railings and rest of porch were scraped, sanded and prepped for painting.
The posts, wall, ceiling and front door were all given a fresh coat of PPG Manor Hall paint.
Now they have a great spot to sit and enjoy an evening cup of tea.
Enjoy
Shrubs were removed and mulched then the railings and rest of porch were scraped, sanded and prepped for painting.
The posts, wall, ceiling and front door were all given a fresh coat of PPG Manor Hall paint.
Now they have a great spot to sit and enjoy an evening cup of tea.
Enjoy
Sunday, July 13, 2014
Deck Refurbishing in Bethel Park
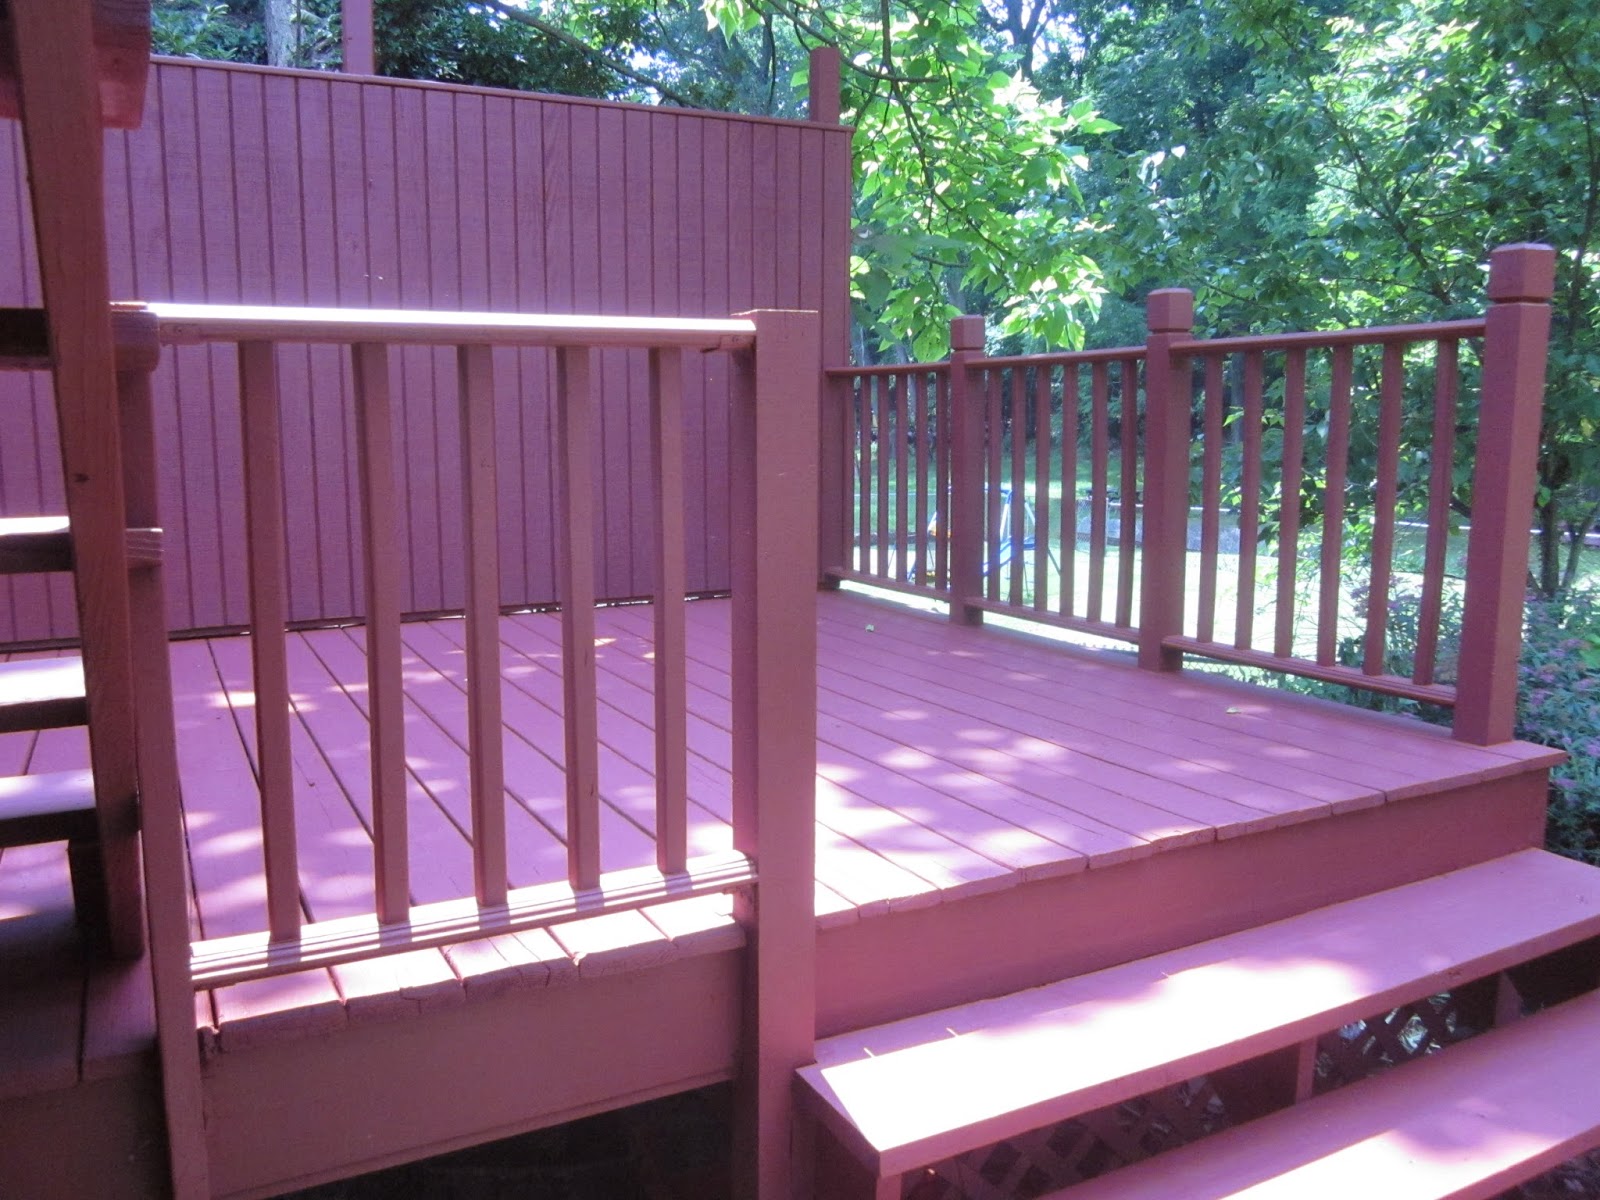
Well many projects have been transpiring so I need to get caught up here on the blog. The most recent accomplishment was a deck rehab project. The wood was in need of a great deal of TLC so many hours of sanding was needed to get to the final post card picture you see here.
Things looked like this after all the sanding was done. If I can find a few before images I'll add them to the post later.
The upper deck actually needed a bit of patchwork. With some wood hardener, wood patch and decking screws we had it back in shape!
The lower and under side of things.
It wasn't pretty
Using Benjamin Moore Arborcoat Solid Stain, we blasted away at all the railings and rungs getting a swell result.
The floor boards and stairs received a heavy brush coating for wear and tear.
The underside was also sprayed to help in preserving the wood.
Fantastic project and happy sustomer!
Enjoy!
Labels:
Exterior Painting,
Remodeling,
Restoration,
Woodwork
Monday, June 30, 2014
HendersonWorks Paper Flower Factory
We don't just paint, remodel, restore and do custom automotive graphics. Here we'll give a brief glimpse of the "HendersonWorks Paper Flower Factory".
Well the Henderson's recently added a Son-in-Law and there were plenty of things happening beforehand. One that received rave reviews was the bouquets of paper flowers.
The three Henderson ladies got together on a weekly basis to create many wonderful things for the wedding. The flowers were an undertaking of determination and love.
Let's gain a little insight into this endeavor....
The "Rose" started with three petal patterns cut from coffee filters and wound individually with floral wire and tape.
Rachael then did the dipping into the pink paint
and blew them dry.
Here Shari is painstakingly separating the petals and curling them.
Sarah took the rose and applied additional coloring to the edges.
It was a slightly darker pink to give a "real" feel to each petal.
And after dry time they had a beautiful rose!
Enjoy.
Well the Henderson's recently added a Son-in-Law and there were plenty of things happening beforehand. One that received rave reviews was the bouquets of paper flowers.
The three Henderson ladies got together on a weekly basis to create many wonderful things for the wedding. The flowers were an undertaking of determination and love.
Let's gain a little insight into this endeavor....
The "Rose" started with three petal patterns cut from coffee filters and wound individually with floral wire and tape.
and blew them dry.
Here Shari is painstakingly separating the petals and curling them.
Sarah took the rose and applied additional coloring to the edges.
It was a slightly darker pink to give a "real" feel to each petal.
And after dry time they had a beautiful rose!
Enjoy.
Monday, June 2, 2014
Window Framing in an Old House
Getting a few things done and one of them is woodwork! The challenge here is to match all the existing woodwork in the house. Here we have lots of old dark wood and we'll need our new boards to match. Which is old and which is new?
Give up?
On this one, the framing around the stained glass is the " new" wood. the inner window frame and stairs are the old.
Here's the window upstairs on the landing with the wood framing ready to go.
We started with some nice pine boards which were selected for the grain. We applied a liberal coating of Minwax Red Mahogany stain. Then once dry brushed on a heavy coat of Minwax Fast Drying Polyurethane.
Here's the starting point
The sill was actually a board from in the house which was thicker than the 1x4 boards used around the windows.
Once he was nailed in place the sides slid in without a hitch.
Finally the lower support.
The upper frame was still good on this window so that one is the old wood.
I think all in all the color and finish match rather nicely
Enjoy
Monday, May 12, 2014
Mural Repair and Painting Work
Finished a mural painting repair job last month and it was quite satisfying. There were six rooms in all but we only have photos from a few of them. This particular room had all manner of holes and scuffs. As you can see, it turned out to be a successful endeavor.
Let's walk through a few of the rooms..
Here in the Jungle Room we had a few holes in the bush areas and...
Lots by the sink and pond.
Once patched the painting had to blend. The original colors were long forgotten so coming up with colors that were close was attempted.
Without a perfect match we decided to solve the problem by creating another "foreground" layer of bushes.
And the pond was repainted in full.
In the Garden Room there was grass below this sink and holes on the left side where a dispenser was removed.
I extended the pond down and repainted the flower so it was all the same color.
Somehow the little kids made a big hole above the butterfly's antenna.
The hole was patched and a cloud was "strategically" placed to cover the area.
A secondary layer was added to the sky to represent either distant hills or a lower cloud layer. This covered other repair areas and worn ares.
The "Nascar" room had several large pieces missing from this mural and needed a considerable amount of blending to finish.
Other rooms just needed unknown colors blended in the sky ares. Clouds wound up being the perfect break point between the two different colors.
The alphabet room was tricky. Not only did these letters need repainted but the wall behind had patching and painting to match.
And the last and extensive room had multicolored walls, multicolored sun rays and areas behind all the painted accent objects.
It wrapped around the room too.
To start we picked a base color for the rays, another for the yellow walls and a third color for the pink walls. Here the deeper background yellow is going on and additional rays were mapped out.
I decided to interlock some of the mural accents by blending in the sun rays and pink color. The notes were especially fun to paint around.
The sun and rays were more consistent now. The original variations were nice, but to buy all the colors needed would have put the job over budget.
And by interlocking the accent objects, it makes the touch up and repair work blend right in.
Enjoy!!
Subscribe to:
Posts (Atom)