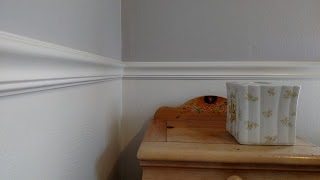
We had fun on this painting turned remodeling job!Painted the old greens and yellows to current greys.
Trim bright white! Makes a classy fresh look.
As always the prep work includes patching holes. Usually from where old paintings and window treatments were hung.
Then a good coat of paint.
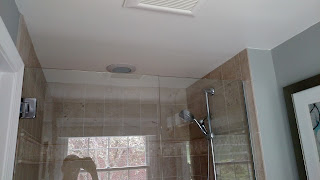
The bathroom was going to be painted until we convinced the Mary and Dan that it would be best to remove the dated lighting, vanity and cabinets.
So, away we went! removing it all....
and replacing it with a clean white and grey look. The original orange tile accents were an awesome touch!
Another great finish!
Enjoy
Monday, November 27, 2017
Ye Olde Bathroom Renovation
Here's a beauty we did this past Spring, Before and After
Started with finding new holes behind the large mirror.
Removed old Reznor wall heating unit, toilet, vanity and accessories.
Fun part was replacing the tile where the wall heater came from. We carefully extracted existing tile from the space where new vanity would go.
And insert old tile! Notice the holes in wall from old toilet tank which was screwed into the old tile. We filled and grouted them to be touched up in the final phase.
Here is another angle of the completed job
All walls and ceiling were painted with Sherwin Williams Duration to hold up in the changing climate of a bathroom.
The trim was painted with Sherwin Williams Pro Classic for its durability.
Final touch ups included matching tile color as close as possible to cover holes in our green tile and also three holes in the black.
Enjoy
Labels:
Bathroom,
Interior Design,
Interior Painting,
Plaster Repair,
Remodeling,
Renovation,
Restoration,
Trim
Wednesday, July 12, 2017
Kitchen Ceiling and Wall Rescue Remedy!
Ran into this project from another referral! A kitchen in dire need of sprucing up.
Wallpaper was very dated and needed to come down. No telling what we might find back there!
The ceiling had three patches in it that didn't blend or hold up to well.
Let's see what we can do here.
Start by removing wallpaper and the portion of ceiling needing replaced. We will cover where all the holes were with one patch.
Like so.
The wallpaper was pretty terrible and wall surface problematic. We had the home owner in to discuss removing the drywall or just adding a light stucco finish. In the end, a stucco finish was more economical and won the day.
Ceiling was repaired and walls painted. A new plain medallion and light fixtures finished it off.
Chair rail was going in but we unfortunately didn't get a shot of it finished.
All in all a decent interior job to do while the rains continue to fall!
Labels:
Interior Design,
Interior Painting,
Kitchen,
Painting,
Plaster Repair,
Restoration
Monday, March 27, 2017
Interior Painting and Ceiling Repirs in Mt Lebanon
Here's another sample of our interior work from a very nice dwelling over in the neighboring Mt Lebanon.
And here's where it started. Trim was painted the same colors as the wall which hid these great features.
There were several areas needing patching and repairs.
The Kitchen ceiling being the worst.
So we begin, putting plastic across all doorways, covering cabinets and appliances, Ram board on floors, plastic and then tarps. What a mess this stuff makes.
But in the end, we have a ceiling that is beautifully repaired, primed and painted!
A new light fixture helps brighten things up too.
We accented the walls with a darker hue on the bulkheads and carries into the dining room.
A recommended flat white ceiling is always a plus.
The original job called for the kitchen and dining room, but the home owners liked our work so much we moved into the living room...
through the entryway and up the stairs to the hall.
The front wall of the living room extended into the front hall, so it was accented with the darker tone to flow with the kitchen and dining rooms.
Another satisfied customer!
Enjoy
Labels:
Dining,
Interior Painting,
Kitchen,
Painting,
Plaster Repair
Monday, January 23, 2017
Bathroom Repairs and Painting USC
We had a small problem child bathroom over in Upper Saint Clair that turned out rather well for us and the customer.
Problem in ventilation led to this messy repair job. After placing tarps to catch debris and covering the fixtures, we scraped off the bad plaster.
Removed all of the mess, cleaned the area and began the repairs.
After a base coat of quick set, we sanded and applied a finish coat. We sanded again and skimmed it with a final touch. Then it was time for a coat of "Silky White" paint to the ceiling.
And the walls received a fresh coat of "Classic Silver".
Customer had beautiful artwork and accents too. The overall design worked well with the color scheme.
Another job done and another customer satisfied.
Enjoy!
Labels:
Bathroom,
Interior Design,
Interior Painting,
Painting,
Plaster Repair
Saturday, January 14, 2017
McMurray PA Repairs and Painting
Long time no blog, but we are always on Instagram and sometimes on Facebook too. This swell home was out in McMurray PA and needed a good bit of repair work and painting. Here is the completed entry looking into the living room. The Hall around the corner to the left is where the repairs started.
Here we are starting the demolition phase. An 18 inch by 12 foot section was removed....
replaced....
and repainted!
Homeowners were as ecstatic as us!
Next was replacing a paneled wall in the den. Removing the old panels was the easy part. Being able to do repairs of drywall is different than liking to do it!
Here it is finished and painted twice.
The original paint color was a deep rose and wound up being to dark for the room. We replaced it with a version of the color used in the office next door called "Honey Blush".
Here is the alleged office.
Bedrooms down the hall were both painted "Mauve Finery"
The living room had a continuation of the hall wall which we painted the same light grey as the balance of the hall. The remaining walls were painted with "Rosebud"
So there you have it, another happy customer!
Enjoy
Subscribe to:
Posts (Atom)