Saturday, November 30, 2013

Steampunk Bathroom Remodeling with Metallic Paints Patinas and Glazes

This Steampunk bathroom remodeling project is a great extension of modeling, stage design and custom paintwork. 

We started with purple walls and an old linoleum flooring. We'll be leaving the fixtures this go around but we'll be going with a "Steampunk" flair metallic walls and trim and simulated wood flooring.

First up was to measure and install the trim pieces and base boards. We also are adding corner caps for our steampunk feel. 

Once the trim parts were in place along the ceiling, corners and walls, we prepared our base coat. We chose a dark warm green color for our undercoat and added fine sand into the paint in the tray for texture. Once the basecoat was dry we added aged bronze upholstery tacks every 12 inches for our rivets.

Our second coat is the Valspar Brilliant Metals paint mixed to "Molten Penny" The metal flakes give a unique finish to the walls and the tone changes depending on the lighting and angle you view it from. We used an angled cross-hatch technique with the application. This produced a look of a brushed metal finish. 

The metallic paint will also vary in appearance depending on the base coat color. 

We then used the Valspar Metal Glaze in "Bronze".

The application was a sponging which varied throughout the room. We used three pieces of sponge and continuously rotated them to not wind up with a pattern. We also had left some of the original base coat show up in crevices and corners so the metal looked aged.
The bronze glaze is very translucent and has a wonderful metallic sheen. You can add multiple applications to vary it's appearance even further. The glaze acts the same way as the metallic paint and will look different depending on the angle and lighting.

Next came the flooring. This is a unique product which can be purchased at Home Depot. The Allure flooring is a double think viyl which glues to itself on two edges. You wind up with a floating floor of planks atached to each other. It is stocked in four finishes including Pine, Oak and Cherry. This is African Darkwood and is a special order. We only needed two boxes, shipping was free and it arrived in two days.

When you are installing the planks, the piece cut off the end of your run is the piece you can start the next row with. This will vary your seems for a more natural appearance.

It can be easily scored with a sharp utility knife and snapped to the length you need. For curves or cutouts, tin snips or any heavy duty cutters will work.

Baseboards and corner molding were primed with white to give the hammered copper spray a brighter look. This creates a great transition from finished floor to walls.

Here the new brushed bronze shelving unit was installed. Eventually additional Steampunk accessories will complete the look.

Enjoy!

Monday, November 25, 2013

Dining Room Patch and Paint Project

Another project completed, this time a dining room  in need of some patch work and a refreshing coat of paint.

We had water damage on the ceiling and walls and old wall sconces which no longer worked. The one on the right wall was already removed. The old crystal chandelier needed updated and replaced too.


Here you can see more of the mess on the ceiling..

Under the windows was another fiasco.

We placed plastic sheeting over the archway to the living room to cut down on the dust and covered the woodwork with tarps and plastic too. Then we commenced plaster patching, sanding, patching, sanding, etc. After some serious patching and plaster work we have our new ceiling.

And under our windows took an additional amount of work. A four inch trowel was to small and the six inch was to large! Trying to get that last inch to blend in such a tight area was challenging.

The wall sconces were refurbished (another project to show you some other time).

The paint was PPG Manor Hall. We selected a slightly off white flat finish for the ceiling. The walls were a satin finish and the color was a tint of the purple used in the kitchen.

Enjoy!

Tuesday, November 5, 2013

Townehouse Interior Painting

Tis the season for interior paintwork!
Townehouse interior painting

Completed a grand interior job last month as the temperature outside started to get chilly. Ben and Lauren had the major portion of a three story townhouse in need of a fresh coat of paint. Included in this one was all the ceilings, trim  and doors.

Townehouse interior painting
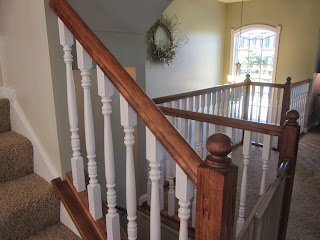
Not so bad? The trim went on and on for miles, there were 21 doors, 19 windows, a fireplace and 72 spindles in their railing.

Townehouse interior painting - Borders
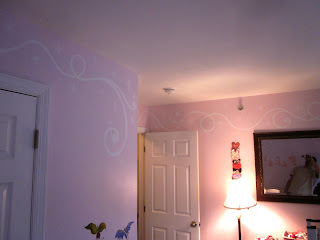
Then the fun stuff, borders in the kids rooms! Natalie received some fairy dust and swooshes in her room with a Tinkeresque fairy leaving the swooshing behind.

Townehouse interior painting - Borders
Sorry the photos aren't that great. 

Townehouse interior painting - Borders
The new babies room received a generous portion of butterflies and curls.

Townehouse interior painting
To start, the ceilings were painted and then the wall work began.

Townehouse interior painting
The patching was mostly done by the homeowner. We had a few spots to touch up but nothing major was needed.

Townehouse interior painting
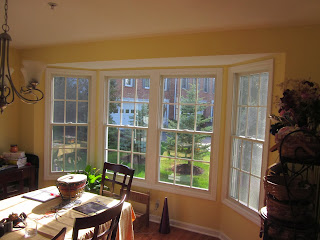
The entry, main living area and family room were painted with Benjamin Moore Coastal Fog

Townehouse interior painting - doors, railing and trim
The top floor hosted a plethora of doorways. For painting, the doors were taken down and all the hardware on them and the door frames were removed.

Townehouse interior painting - doors, railing and trim
Then carefully carry them down the stairs, apply paint and tote back up once finished. Everything seems difficult at the outset, but the satisfaction of a completed project is joyous!
Townehouse interior painting - doors, railing and trim
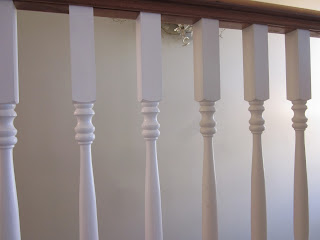
The handrails and base remained a stain while the spindles were painted white. Here you can see the three to the right are ivory and the left three have had their coats brightened with the white.

Townehouse interior painting - doors, railing and trim
And these spindles too have been freshened up.

Townehouse interior painting - doors, railing and trim
Yes they keep going!

Townehouse interior painting - doors, railing and trim
The stairway and the upstairs hallway were painted with Benjamin Moore Fog Mist. This is a lighter compliment to the Coastal Fog used on the main floor. This was done due to less daylight being in these areas.

Townehouse interior painting
The new baby's room was prepped and covered with Benjamin Moore Smoke Embers

Townehouse interior painting - BordersThe border was applied and needed a last minute color adjustment to stand out from the walls.

Happy place.

Townehouse interior painting - Borders
Natalie, the big sister, was treated to the fairy dust and grand spirals left behind by passing fairies.

Townehouse interior painting - Borders
Needless to say, she was very excited.

Townehouse interior painting - challenges
Today's open floor plans can leave several challenges like multi-level ceilings, large uninterrupted wall spaces and trim in high places.

Townehouse interior painting - challengesHowever, all said and done, it leaves you with a great accomplishment. This was a wonderful project to be part of!

Enjoy!

Saturday, October 5, 2013

Painting and Staining Porches

Staining and Painting porches
Been very busy lately with some big projects but thought I needed to get something up here! Been quite some time so here you go. We were able to squeeze a few small jobs in recently and painting and staining porches are the project for the day.

Staining and Painting porches
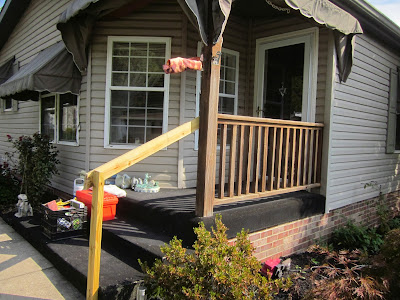
Trouble with older stained porches is getting the color to match the new stain. Even more troublesome is new boards and old boards. This porch had recently been fixed and had two new pieces. Using Benjamin Moore Arborcoat solid stain we had at it.

Staining and Painting porches
There are a good many colors to choose from and we wanted to compliment the siding and awnings. Anita, the home owner, was very happy.

Staining and Painting porches
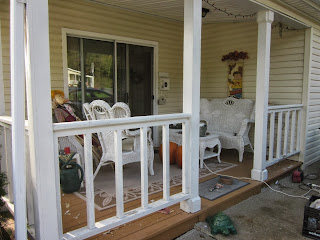
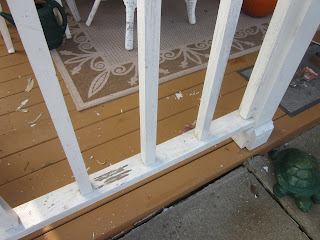
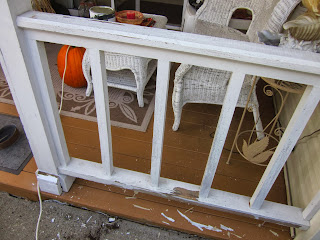
The second porch was painted before and needed some of the older paint to be sanded and scraped.

Staining and Painting porches
The bottoms are usually always worse than the top.

Staining and Painting porches
Once the loose material is scraped away, sand the edges down with 100 grit paper then 180 or 220 grit. Using a good thick paint like the PPG Manor Hall line will hide any slight imperfections.

Staining and Painting porches
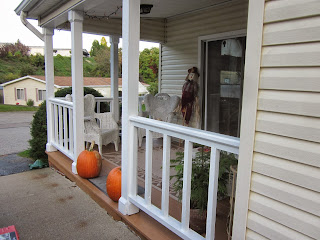
Once cleaned up and painted, the porch will look much better.

Staining and Painting porches
If you have a project large or small we ca handle it for you

Enjoy