This was a fantastic exterior painting project that really had us on our game!
When we first looked at the house, Meli Plastering was renovating the stucco, some foundation work and associated trim.
Our job was to paint everything that wasn't stucco!
We started in earnest on one of the higher points.
This new breezeway porch roof would need primed and double coated with Sherwin Williams Emerald line.
Around back is a superb second floor porch....
and many unique architectural accents.
Our crew was hard at work with ladders and....
scaffolding everywhere.
We eventually worked our way back to the front of the house
and to this amazing front porch.
Not to slight the side porch.
And the rear of the house leading to it.
We can't say enough about this excellent dwelling!
...
Enjoy!
Tuesday, August 21, 2018
Sunday, June 17, 2018
Old Ceiling Rennovation with Tile Replacement
Oddball post on a ceiling we installed for some very nice folks! Using Armstrong
Ceiling 12-in x 12-in surface-mount acoustic ceiling tile we replaced an old tile which had fallen down. a slight deviation from painting but not to far of a stretch for us.
Here was the original surface with card board shims in the low spots.
Planning is very important and we'd recommend reading the manufacturers instructions on these projects. We used wood furring strips and plenty of shims.
Once everything is laid out and the tiles get going, it moves pretty fast.
and before you know it, you have a ceiling!!
Enjoy!
Friday, February 23, 2018
Nevillewood Interior Niceties
Another past project that never made it onto the Blog was this beautiful space in Nevillewood.
 The original trim had been given a very poor "distressed" look. Well at least we hoped they tried to do this!
With the green walls, the new owner was feeling pretty ill.
We started with a good preparatory sanding and cleaning then off to the prime coat.
The top coat applied was Sherwin Williams Pro Classic
Next we began to eliminate the green that was so despised by the homeowner. Fortunately she could see past the color to the space instead.
more gone....
and completed.
Great sitting area on the balcony.
Believe it or not, this angled part of the ceiling was painted green too!
Here is the Den which was a putrid pink!!
Much better now, you can enjoy the fantastic woodwork instead of being drawn into the awful color.
The dining room was black, so this wonderful light yellow was quite the contrast.
Thanks to Sherwin Williams ProBlock for covering those walls!
And yes, the green is out of the halls too!!
Enjoy!
Labels:
Dining,
Interior Design,
Interior Painting,
Painting
Monday, February 12, 2018
Bathroom Remodeling in McMurray
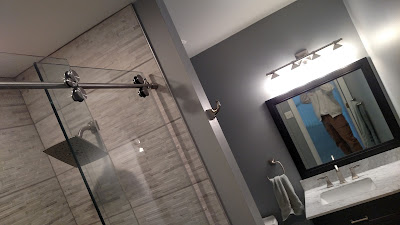
Here's a spiffy bathroom renovation we were able to do for a great couple out in McMurray PA. This is a photo of the completed project and we'll continue with a walk through the process.
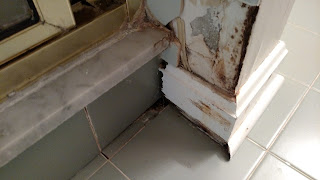
This was what we had to start with.
Dated tile, shower door, color scheme...
toilet...
and water damage too. The goal was a new tile floor and shower along with new toilet, vanity and fixtures.
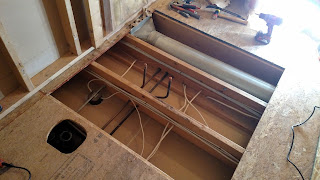
Everything starts with demolition!
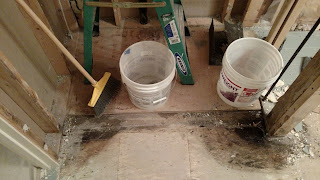
Once the tile floor was out, the sub-floor could be assessed.
We removed a waterlogged section of the floor and unfortunately the wall it supported. Our plumber capped the supply lines and we began the rebuild process.
Once the new sub-flooring, wall and plumbing was back in place the new TileRedi shower pan was installed. This is a wonderful product for tile bases!
The existing walls had lots of texture from previous wallpaper removals so we replaced the damaged ones to save time in the long run. Here the new drywall and cement board for the tile are being installed.
Walls are in and primer is going on!!
Primed, and ready for paint and tile installation.
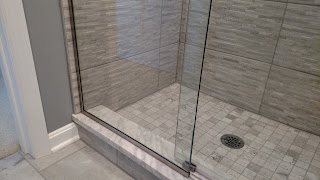
Shower flooring goes in first and then the step. We had a great piece of marble cut for the job at the Stone Connection out on Neville Island. They do quick wonderful work!
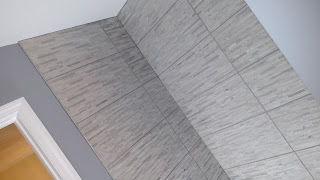
Next the walls go up!! On the edges we used metal track for a crisp finish.
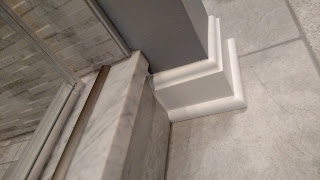
Last, the flooring. Sorry the photo isn't fantastic but the floor is!
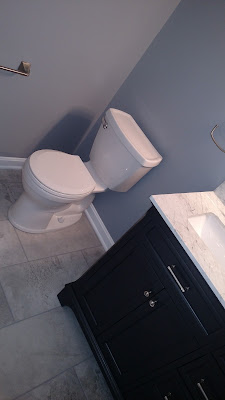
When the vanity was fitted in place, the supply lines were half an inch to short!! That's when you get in a good plumber to add an extension. A shark bite fitting would have been below the cabinet base height so not an option.
However, a little patience and there you have it!
New lighting and mirror installed too!
The final step was this really sweet barn style glass door from Rex Glass. They were very professional to work with from start to finish.
Thus another fantastic job done and with a great deal of satisfaction and happy customers, we can move on to the next one!!
Enjoy
Labels:
Bathroom,
Flooring,
Interior Design,
Interior Painting,
Painting,
Remodeling,
Renovation
Subscribe to:
Posts (Atom)


